The BBC and Master Computer Public Domain Library
Repairing
Keyboards 20/08/2000, 15/09/2000
and 04/08/2003
By
Chris Richardson
For more information about keyboards and keyswitches, please see here.
I have offered advice on keyboard repair many times. I have repaired quite a few myself. I intend to reveal my secrets here to hopefully assist you if you have a faulty keyboard.. First of all, try this:
8
bit Acorn machine keyboards like to be used.
If they go unused for any length of time, then they
start to play up. The odd key refuses to work or works intermittently. The
first thing to try is to just use the keyboard, give the key a good firm rattle
for a minute or so.
Quite often, this is all that is required. On a BBC B and Master 128, if that fails, pop the keytop off by gently easing a small screwdriver between the keytops and carefully prizing the keytop off its peg.
If a keytop is particularly stubborn, take an adjacent keytop off first, this gives you a better 'swing' at it. When the top is off, rattle the keyswitch again and blow down into it.I have found that the above two methods fix the majority of keyboard problems.
Take
it to Bits
If the good old rattle it method does not work, you
are going to have to take your BBC to bits. Here I shall describe each machine
in turn:
Electron
BBC B and B+
Master 128 Type 1
Master 128 Type 2
Master Compact
Electron
Unplug it from the mains! The Electron has 4 small screws
holding the case together, remove these. Be careful as you separate the two
halves of the case as the ribbon from the keyboard to the motherboard still
holds the two halves together. Ease the keyboard connector plug off its socket
.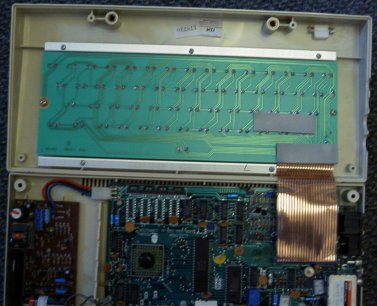
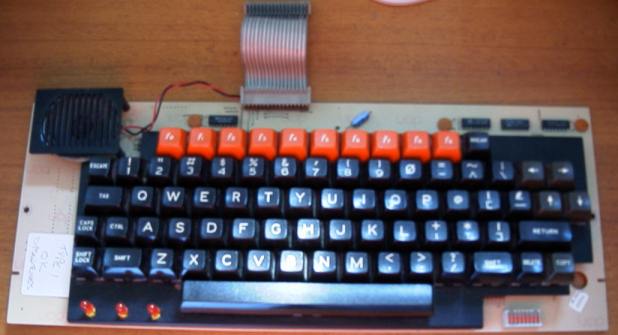
Above is the Electron before the keyboard ribbon cable
has been unplugged
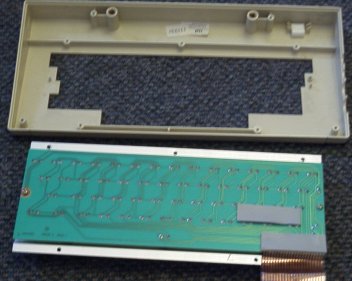
Above is the keyboard after being removed from the top
half of the case. Five small screws hold the keyboard in.
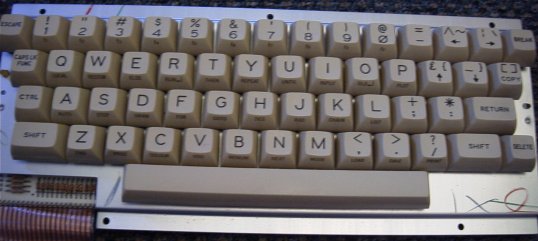
Above is thetop view of the Electron Keyboard
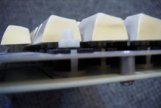
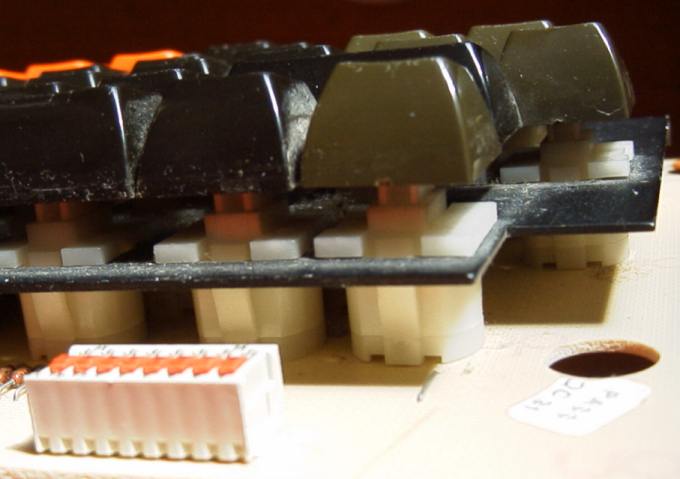
A side view of the keyboard. The upper layer is just
a frame that the keyswitches are pushed through. The lower layer is the circuit
board that the switches are soldered to. The keyswitches are the same as the
Master 128, please see the Master 128 section for
info on repair and desoldering.
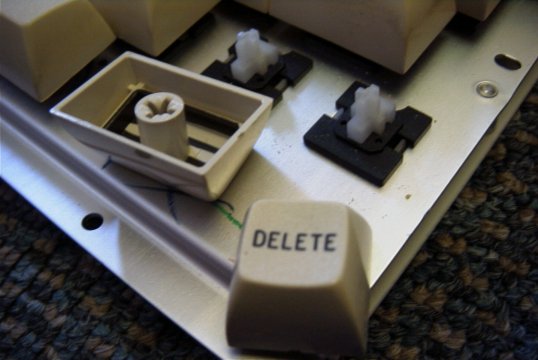
A close up showing Electron keyswitch and keytop.BBC
B and B+
Unplug it from the mains!
The keyboards for the BBC B and B+ are the same. There are 4 screws holding
the cover on to the BBC B and B+, two underneath at the front and two on the
back panel. Remove these screws and lift off the lid.The BBC has two bolts
holding the keyboard in. Remove them
There is a loudspeaker plug underneath the keyboard, it just slips off. Check out the keyboard ribbon cable connector that pulls off at both the motherboard and keyboard end. Push it on and off a few times, this is sometimes enough to clean a dirty connection that may be causing a problem.
Lift out the keyboard and carefully check the faulty keyswitch solder. Try a circuit tester on the pegs and the vicinity of the pegs. Sometimes, reheating the solder with a soldering iron will fix a dry joint.
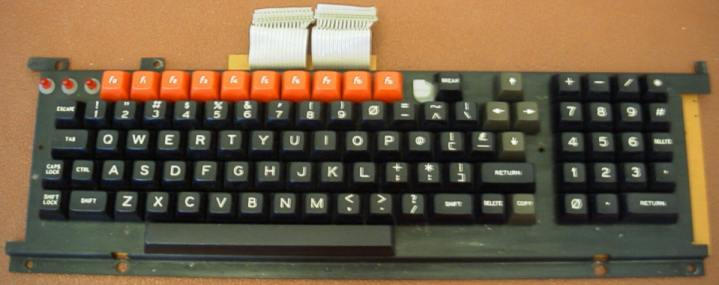
This
image shows a section of the BBC keyboard. Note the switch on the bottom right
corner, these are the keyboard links used to set boot up mode and disc drive
access times. Usually, there are two sets of holes here that you solder wire
across. If you have a switch, you are lucky.
There are two soldered pegs holding each keyswitch in.
To desolder a keyswitch, you need a solder pump to suck out the hot solder
from each peg as you heat it up, although it is possible to heat both pegs
up at once and pop the switch out if you don't have a solder sucker.
Wash the switch in isopropyl alcohol, or replace it with a known working switch (I would recommend replacement unless you really enjoy desoldering keyswitches that you think were fixed and clap out in 2 days time).
Check the tracks on the underside of the keyboard. Sometimes they can become broken. You can repair a track by scratching the layer of varnish off the area and soldering a piece of wire over the break.
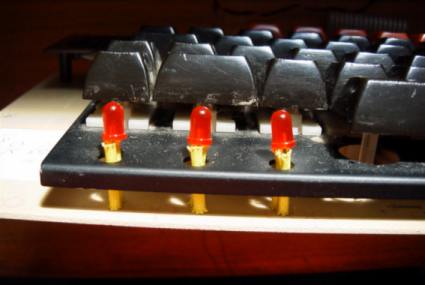
Sometimes, you may need to resolder the wires of the LEDs as they tend to work loose on many machines.
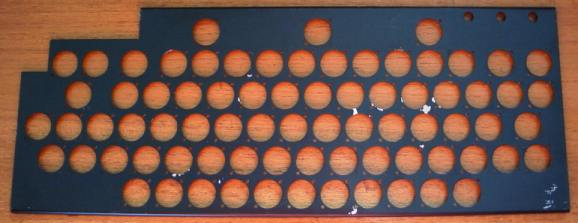
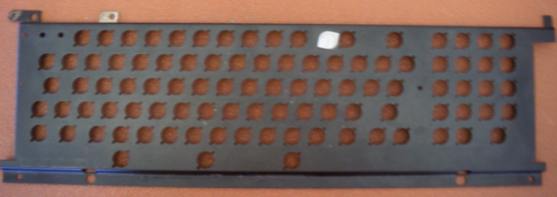
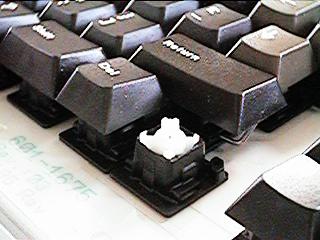
Here is a close up of a hole in the mounting plate that holds the keyswitch. Little pegs and clips hold the keyswitch in place, the keyswitch simply pulls off this part

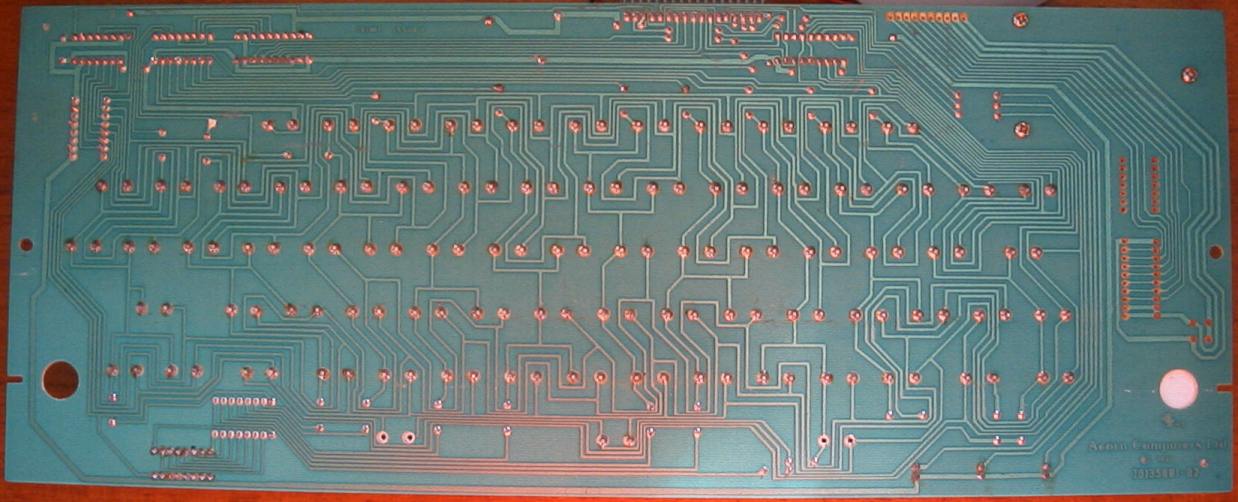
This
is the whole plate:
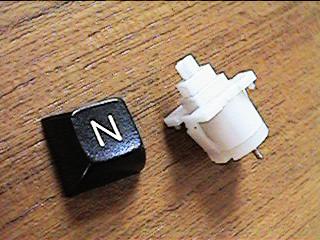
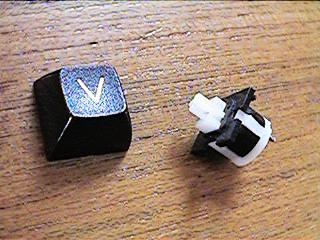
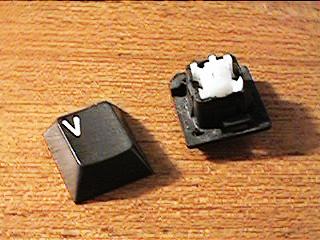
BBC B and B+ Keyswitches and Keytops This is the most common BBC keyswitch and keytop that I have found. I call it type 1 (Futaba)
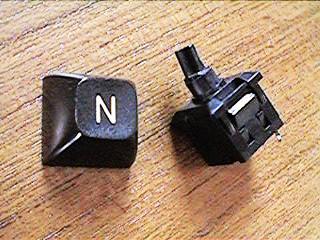
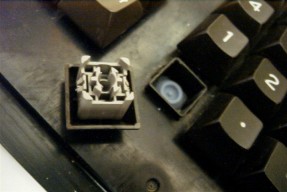
This is another, not so good BBC keyswitch, they seem more prone to failure, I call these type 2 (Cheap SMK):
Here is an AVI of me mending a keyboard. It is 15 megabytes and has been speeded up by a factor of 10
Unplug it from the mains! The Master 128 has 4 screws holding the lid on, two long ones underneath to the rear and two short ones underneath to the front. Lift the lid off to reveal the keyboard held in with 4 screws. 3 larger ones and a small one with a clip to the power supply. There are two ribbon cables that push on to connectors on the motherboard.
Push the connectors on and off a few times, this is sometimes enough to clean a dirty connection that may be causing a problem. Lift out the keyboard and carefully check the faulty keyswitch solder. Try a circuit tester on the pegs and the vicinity of the pegs. Sometimes, reheating the solder with a soldering iron will fix a dry joint.
There are two soldered pegs holding each keyswitch in. To desolder a keyswitch, you need a solder pump to suck out the hot solder from each peg as you heat it up, although it is possible to heat both pegs up at once and pop the switch out if you don't have a solder sucker. Wash the switch in isopropyl alcohol, or replace it with a known working switch (I would recommend replacement unless you really enjoy desoldering keyswitches that you think were fixed and clap out in 2 days time).
Check the tracks on the underside of the keyboard. Sometimes they can become broken. You can repair a track by scratching the layer of varnish off the area and soldering a piece of wire over the break.Sometimes, you may need to resolder the wires of the LEDs as they tend to work loose on many machines.
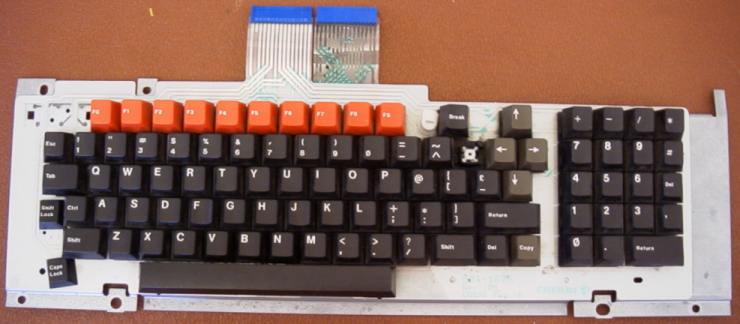
Master
128 Type 2
The Master 128 has 4 screws holding the lid on, two
long ones underneath to the rear and two short ones underneath to the front.
Lift the lid off to reveal the keyboard held in with 4 screws. 3 larger ones
and a small one with a clip to the power supply. There are two ribbon cables
that push on to connectors on the motherboard.
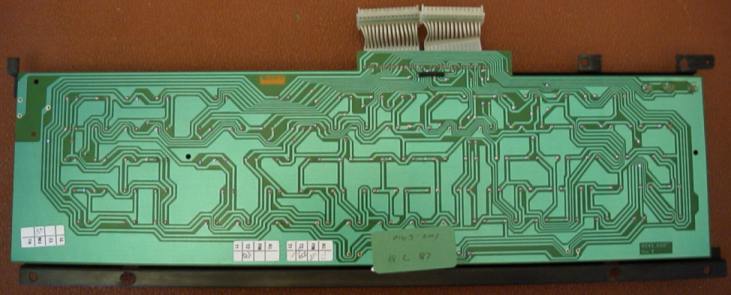
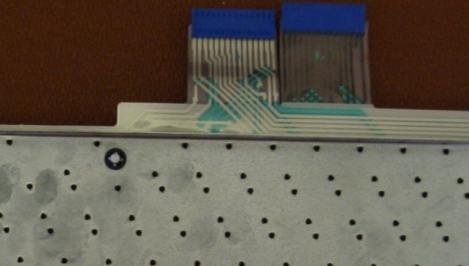
Push the connectors on and off a few times, this is sometimes enough to clean a dirty connection that may be causing a problem. The new style keyboard for the Master 128 is completely different from the BBC B and Master type 1 keyboards. It consists of two membranes separated by a layer with holes in it. When you depress a keyswitch, the switch presses on the top layer and causes it to make contact with the bottom layer, making the required circuit. A foreign object between these layers may cause the switch to fail.
The
underside
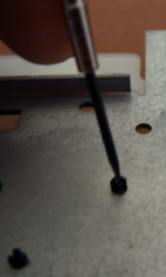
Pushing out a keyswitch peg from the underside:
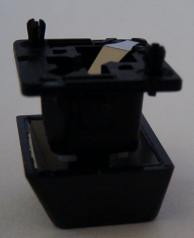
A full keyswitch. Note the metal strip that pushes on
to the membrane to force a contact:
Showing
the 3 layers of the membrane
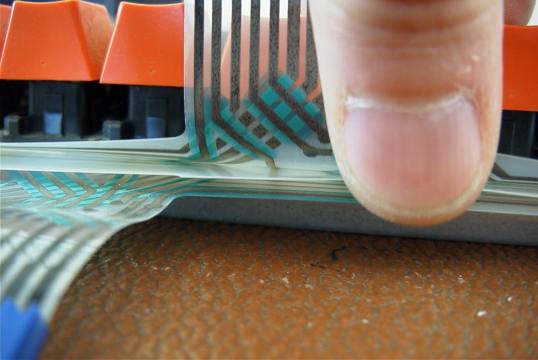
Another
view of the three layers, this shot shows the holes through the middle layer

The
keys are clipped to the board into a plastic layer containing the tracks.
Avoid dismantling the LED assembly on this keyboard as it has some tiny springs in it, you will have hours of fun trying to reassemble it.
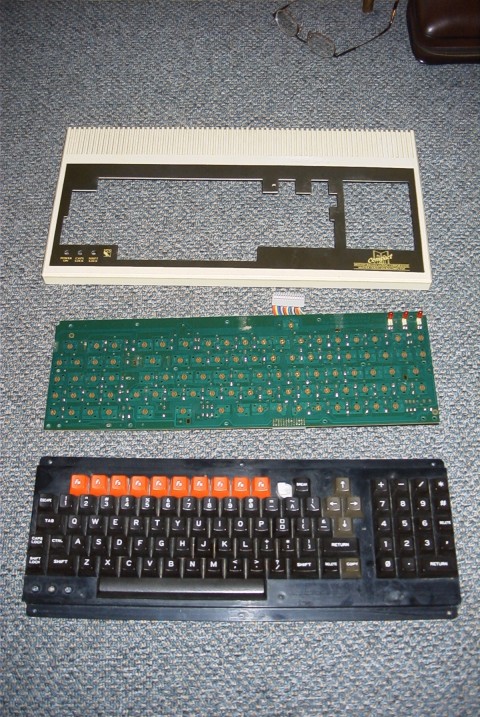
Master Compact
The Master Compact has 4 screws holding the case together,
remove these. There is a helpful diagram on the underside showing which holes
the screws are in. There are about 15 small screws holding the keyboard together.
There is one multicoloured ribbon and plug on to the motherboard.
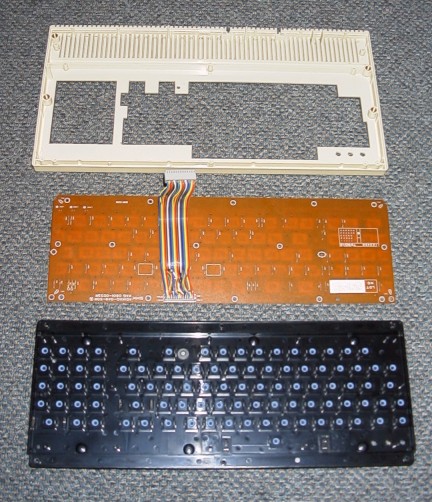
The
following pictures show the construction to be fairly simple. Usually, all
that a faulty switch needs is a wipe over with a clean cloth on the circuit
board. Master Compact Keyswitch and top:
Master
Compact Keyboard